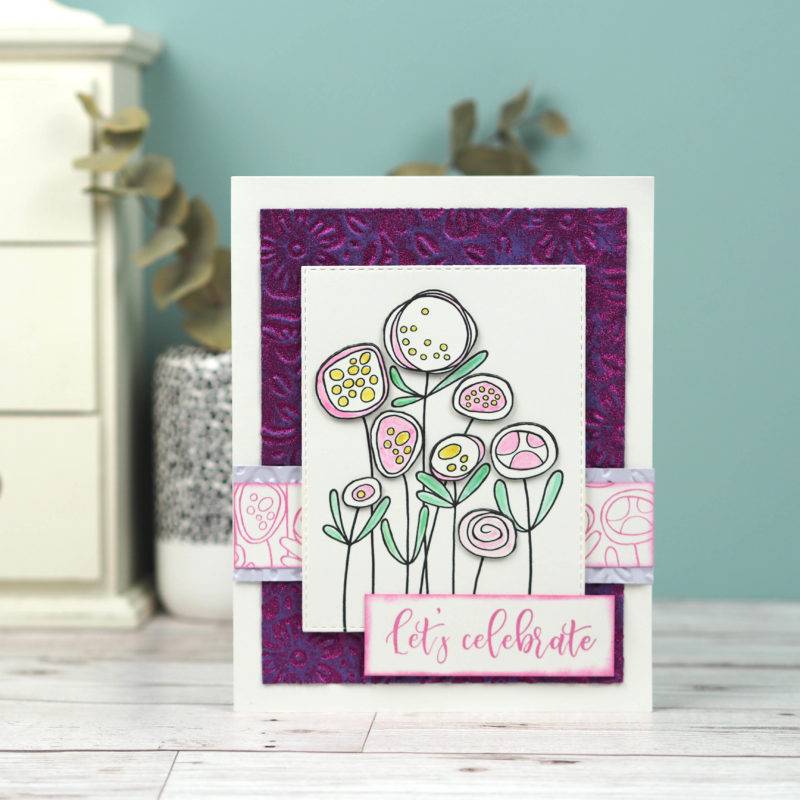
Lets Celebrate Congratulations Card
Create this stunning sparkly congratulations card using our step by step instructions and links to all the items needed to make it.
Products used in project:
- Foundation Card A4 Amethyst 200gsm pk 25 41020
- Foundation Card Wisteria A4 pk 25 220gsm 41036
- Foundation Card Coconut White A4 220gsm pk 25 40980
- Woodware Clear Singles – Circle Flowers JGS492
- Woodware Clear Singles Scripted Wishes FRS722
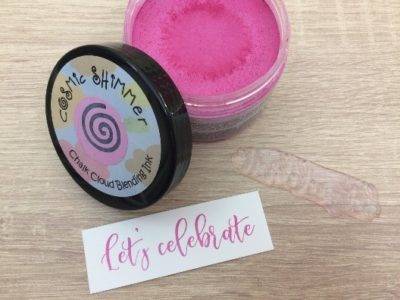
- Cosmic Shimmer Chalk Cloud Blending Ink Princess Pink CSCHPRINCESS
- Cosmic Shimmer Glitter Kiss Antique Rose CSGKROSE
- Phill Martin CS Shimmer Shaker Delicate Blossom CSPMSSBLOSSOM
- Phill Martin CS Shimmer Shaker Bright Sunshine CSPMSSSUN
- Phill Martin CS Shimmer Shaker Lime Burst CSPMSSLIME
- Bountiful Blooms 3D Embossing Folder EF3D-002
- Shadow Boxes Collection Scalloped Lattice Frames – Set B CED9306 (Optional)
These handy tools will make your card creation process much simpler!
- Spray bottle
- Die cutting machine
- Foam tape
Step by Step Instructions
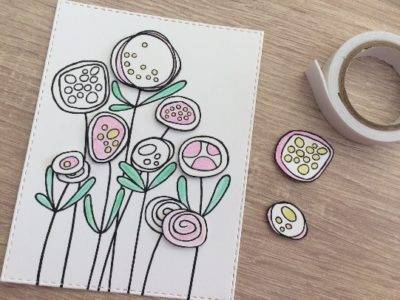
Step 1
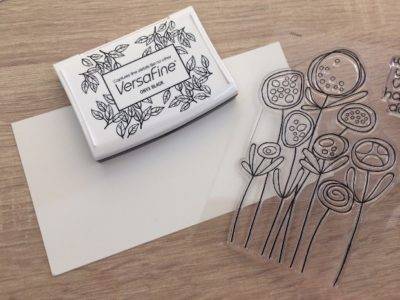
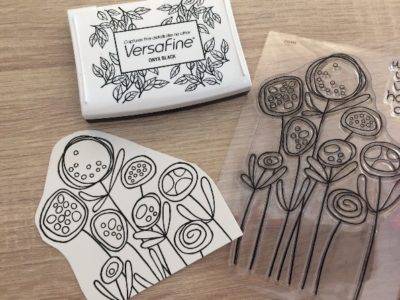
On Coconut White card sized 10 x 13cm, stamp the flowers with Versafine ink.
Optional: you can use the Shadow Boxes Collection Scalloped Lattice Frames Set B to cut this card.
Tip: Versafine gives a nice clear impression and can be coloured with markers or any kind of watercolour without smudging.
Step 2
Stamp the flowers again on a small piece of Coconut White card.
Step 3
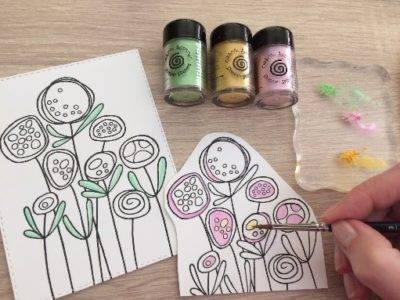
Colour the flowers on the small piece pf card and the petals on the bigger card with Cosmic Shimmer Shimmer Shakers diluted with water to make a watercolour paint. Keep a piece of cloth to take off too much water from your brush, and a bowl of clean water to clean you brush in between colours.
Step 4
Fussy cut the coloured flowers and attach then to the card with foam tape over the stamped image, for extra dimension and interest.
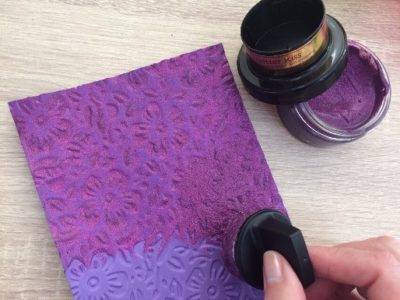
Step 5
Emboss a 21.8 x 17cm piece of Amethyst card using Bountiful Blooms embossing folder and colour it with Cosmic Shimmer Glitter Kiss in Antique Rose.
Tip: Apply generously so it gets into the debossed parts and go over it again to take off the excess and get a thin layer on the raised parts.
Step 6
Stamp the sentiment onto a small piece of Coconut White card.
Step 7
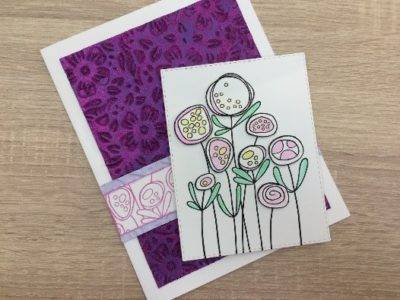
Stamp the flowers with the Chalk Cloud ink on a piece of Coconut White card sized 3 x 14.8cm. Tape it to a strip of Wisteria card sized 4 x 14.8cm.
Tape the Glitter Kiss card to a white base sized 14.8 x 29cm and tape the strips on top.
Tip: Where it says tape you can also use glue, I find tape very easy and less messy to use on the particular card.

Step 8
Position all the pieces on the base card. Glue into place.