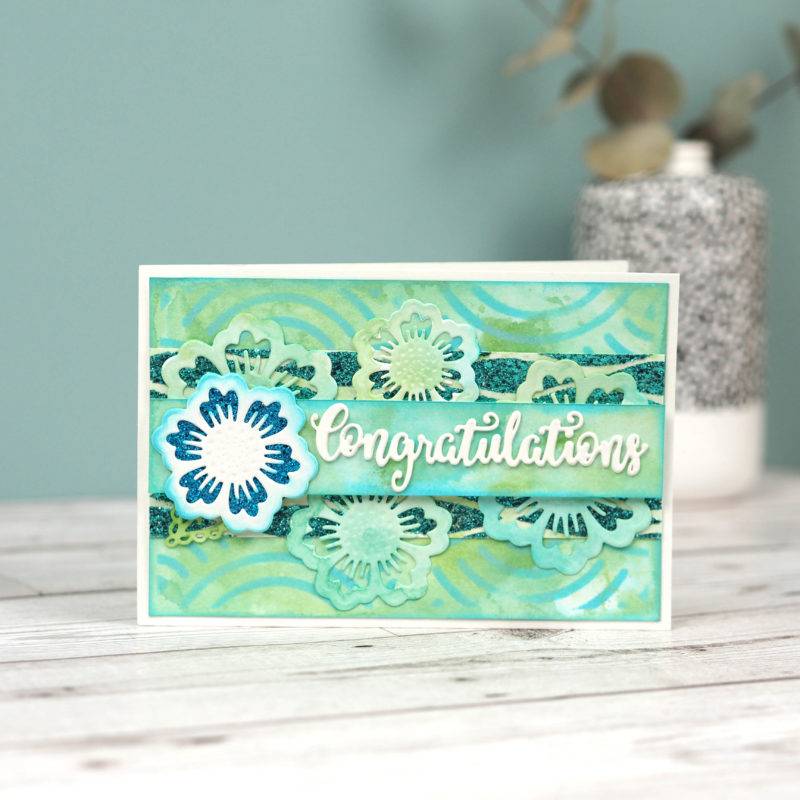
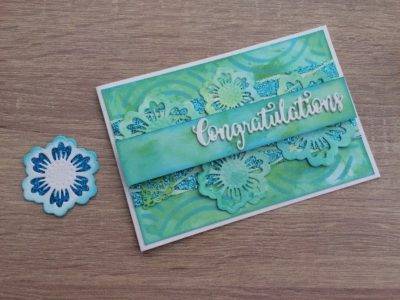
Congratulations Celebration Card
Follow our step by step instructions to bring a smile to someones’s face with this colourful Congratulations card!
You will need:
- Foundation Card Coconut White A4 220gsm pk 25 40980
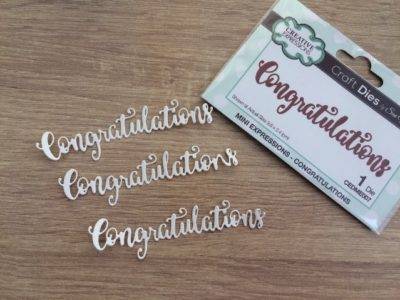
- Mini Expressions Collection Congratulations Die CEDME007
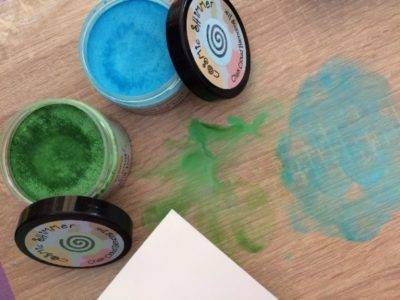
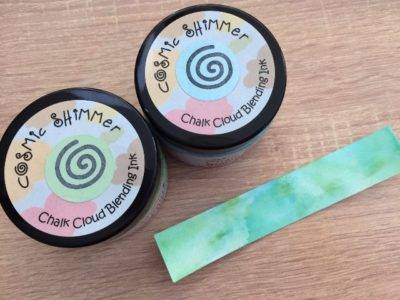
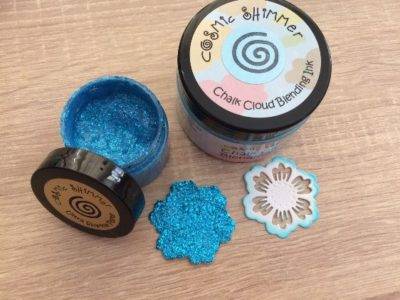
- Cosmic Shimmer Chalk Cloud Blending Ink in Blue Lagoon CSCHLAGOON
- Cosmic Shimmer Chalk Cloud Blending Ink in Sweet Apple CSCHAPPLE
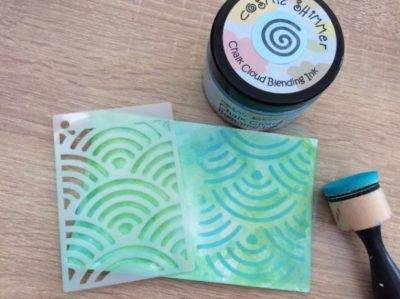
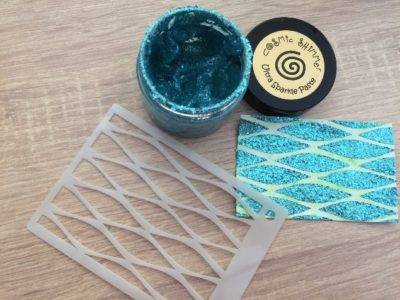
- Creative Expressions Mini Stencil Rainbows CEMSRAINBOW
- Finishing Touches Collection Passion Flower Die CED1497
- Cosmic Shimmer Ultra Sparkle Texture Paste Ocean Spray CSUSPOCEAN
- Cosmic Shimmer Ultra Sparkle Texture Paste Turquoise CSUSPTURQ
These handy tools will make your card creation process much simpler!
- Spray bottle
- Die cutting machine
- Foam tape
Step by Step Instructions
Step 1
Cut coconut white card in half length wise. Fold one piece in half to form the base card. Cut the other piece to 9.5 x 14.cm. Apply Cosmic Shimmer Chalk Cloud ink straight onto your workspace using a smoothie sponge. Spray some water to dilute the ink. Dip the smaller piece of coconut white card and let dry or dry with a heat tool and repeat until the card is covered with the Chalk Cloud ink.
Step 2
Apply blue Lagoon ink on the card with a stencil on the right side. Turn the stencil so the pattern is upside down and apply it again to the left side.
Tip: For a continuous pattern overlap the stencil across the card.
Step 3
Cut the sentiment 3 times from spare coconut white card and glue them together. This will add some dimension to the card.

Step 4
Colour a card strip as described in step 2, with a bit more green.
Step 5
Apply Cosmic Shimmer Ultra Sparkle Paste with a palette knife and the Waves stencil. Allow to dry.
Step 6
Colour a card strip measuring 2.5 x 14.3cm as described in step 2.
Step 7
Using the Flower die and coconut white card, cut 5 top layers and 1 shadow layer. colour 4 flowers using Chalk Cloud inks as in step 2. Colour the edges of 1 flower with Blue Lagoon ink. Use Ultra Sparkle paste to colour the shadow layer.
Step 8
Position all the pieces on the base card. Glue into place.
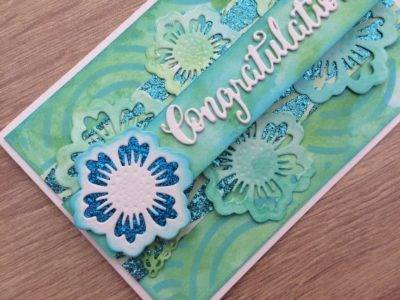
Step 9
Glue the remaining flower layers together and attach it to the strip to finish the card.